
How Jekyll Works
12 Aug, 2026
Table of Contents
Introduction
Jekyll is a popular tool for creating static sites (meaning it can be deployed to any place that serves files via HTTP), particularly blogs. It's very easy to use:
$ jekyll new myblog
$ cd myblog
$ jekyll serve
It will create a Jekyll site with a default theme and an example post. Browse to http://localhost:4000:
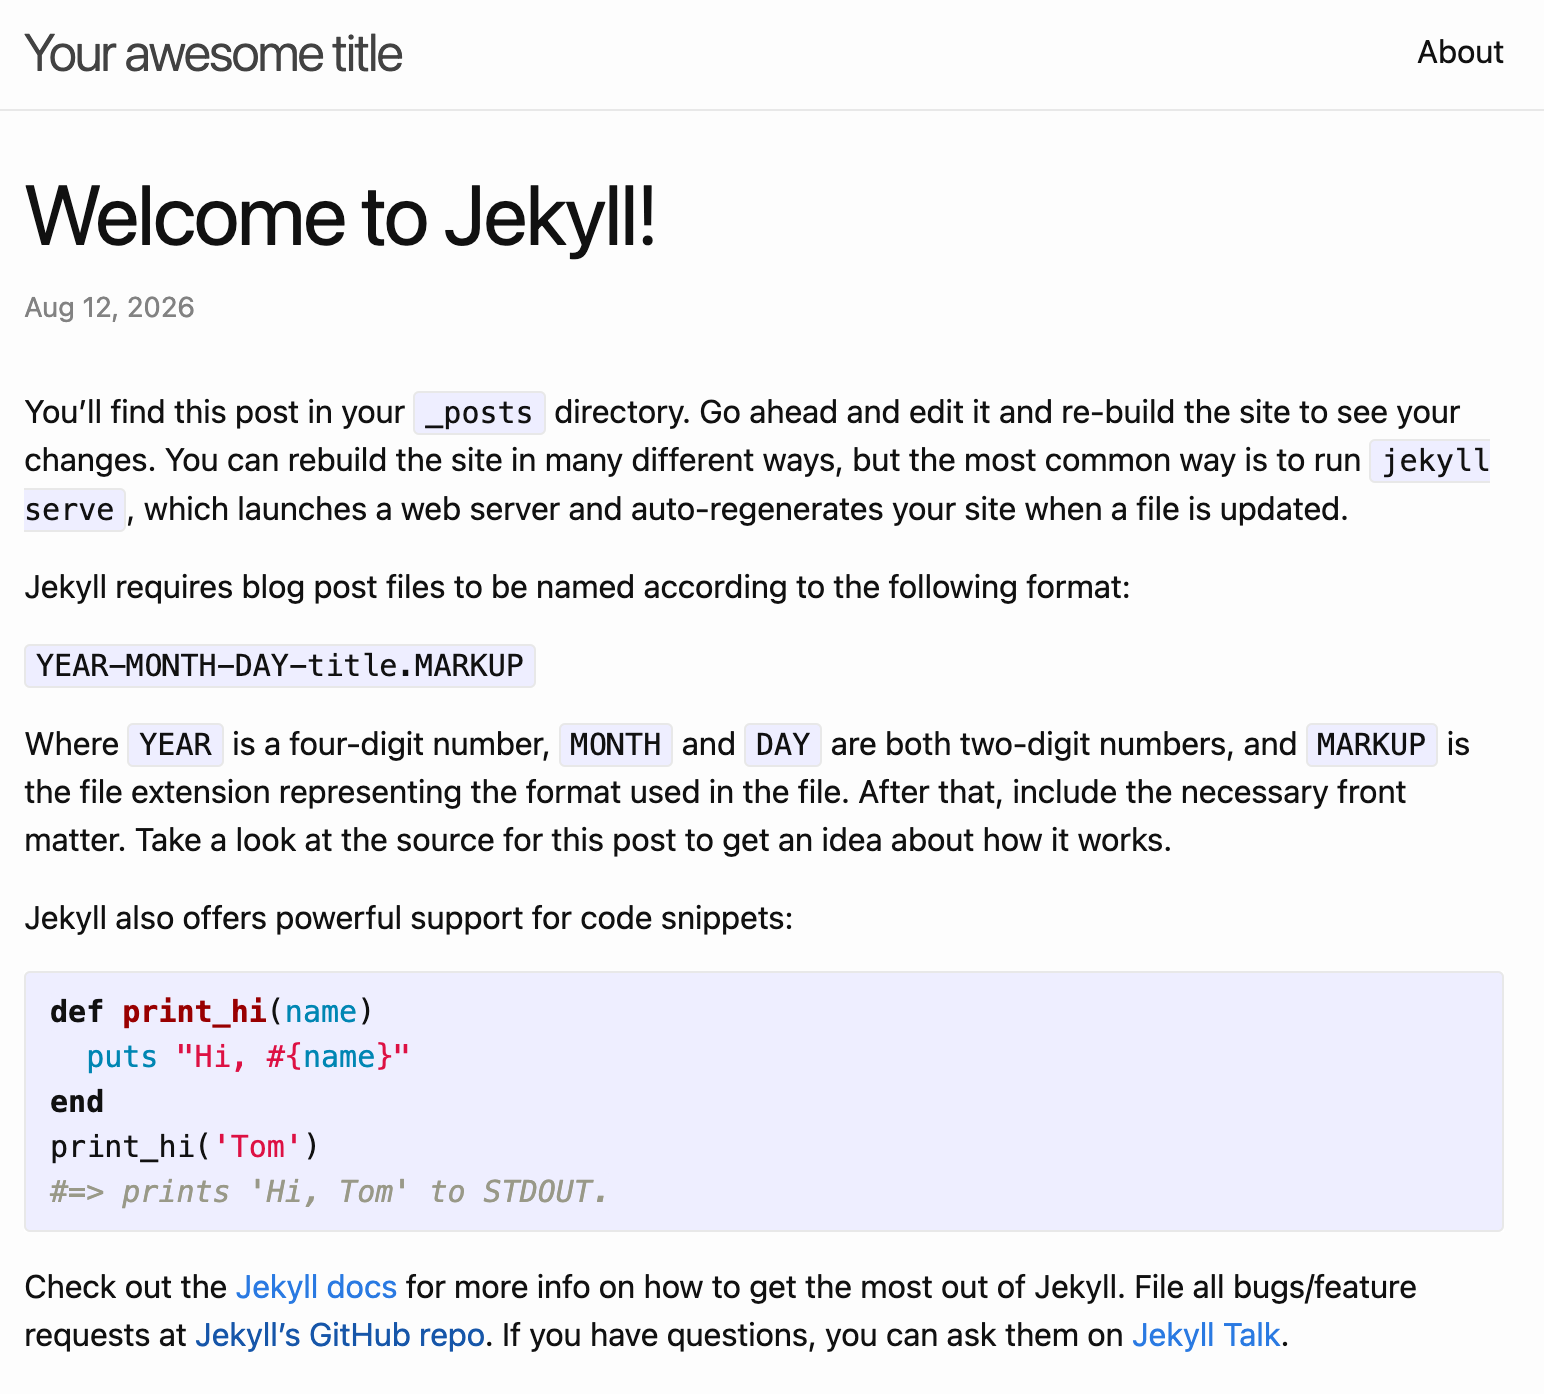
You can add a post by creating a file in _posts/ directory (instructions in the above image).
Jekyll codebase has only about 6800 lines but can do so many things. This post will attempt to guide you through such a small but elegant static site engine implementation.
The Codebase
Jekyll is written in Ruby (currently, it is built and tested against Ruby 3.0). This article refers Jekyll v4.4.1.
The structure:
exe/
  jekyll
lib/
  blank_template/
    _config.yml
    _layouts
    _sass
    assets
    index.md
  jekyll/
    cache.rb
    cleaner.rb
    collection.rb
    command.rb
    commands/
      build.rb
      clean.rb
      doctor.rb
      help.rb
      new.rb
      new_theme.rb
      serve/
        live_reload_reactor.rb
        livereload_assets/
          livereload.js
        mime_types_charset.json
        servlet.rb
        websockets.rb
      serve.rb
    configuration.rb
    converter.rb
    converters
    convertible.rb
    deprecator.rb
    document.rb
    drops
    entry_filter.rb
    errors.rb
    # ...
features/
Gemfile
jekyll.gemspec
When you run $ jekyll serve, it executes the code in lib/jekyll/commands/serve.rb. The execution flow looks like this:
graph TD
    A[jekyll serve] --> Build["Build command\n<span style='font-size:0.8em'>(lib/jekyll/commands/build.rb)</span>"]
    Build --> Site["Site#new and #process\n<span style='font-size:0.8em'>(lib/jekyll/site.rb)</span>\n\nload plugins and render documents"]
    Build --> Serve["Serve command\n<span style='font-size:0.8em'>(lib/jekyll/commands/serve.rb)</span>"]
    Build --> Watch[watch for source file changes]
    Watch -- if any files in the sources dir changed --> Build
The Build Command
Build basically boils down to:
  site = Jekyll::Site.new(options)   # set options and load plugins
  site.process                       # process site
Where options are things like source, destination, layouts_dir, etc. Full options defined here.
The protagonist is the Site object. Constructed with Site#new(...), it loads all the necessary plugins (more on plugins later). Generating the site is exactly with the following Site#process() code:
def process
  return profiler.profile_process if config["profile"]

  reset
  read
  generate
  render
  cleanup
  write
end
We will go through these instructions one by one.
NOTE: Don't worry about
profiler.profile_process()for now. It calls the same instructions asprocess()but with the timer running for each instruction. We will get to this in the Profiling section.
Resetting the Site's State (reset)
reset method sets all things like layouts, pages , static_files, etc. to empty states ({}, nil, etc.). So every time Site#process() runs it starts clean.
Reading Contents (read)
read calls Jekyll::Reader#read() which scan through layouts directory (_layouts/ or whatever specified in the layouts_dir site configuration), theme's layouts directory, and source files directory. All posts, pages, static_files, theme, and data (mainly their contents and paths) get stored in the Site internal states:
site.layoutsis an array ofJekyll::Layoutsite.postsis a special collection, eachsite.posts.docsisJekyll:Documentsite.pagesis an array ofJekyll::Pagesite.static_filesis an array ofJekyll::StaticFile
During this call it reads theme's assets into site.layouts, site.pages, and site.static_files. The theme configurations themselves get read into site.theme during Site#new(...).
Generating Additional Contents (generate)
This step invokes all the loaded generators. Generator is one of the two types of Plugin that gets loaded when we invoke Site#new(...) at the start of the Build command (see The Plugin System).
At the time of each invocation, it is provided with the site instance so it has access to all the loaded posts, pages, static_files, and data from the previous step.
For example, this is the excerpt from the jekyll-sitemap plugin that generates a sitemap:
def generate(site)
  @site = site
  @site.pages << sitemap unless file_exists?("sitemap.xml")
  @site.pages << robots unless file_exists?("robots.txt")
end

def sitemap
  site_map = PageWithoutAFile.new(@site, __dir__, "", "sitemap.xml")
  site_map.content = File.read(source_path).gsub(MINIFY_REGEX, "")
  site_map.data["layout"] = nil
  site_map.data["static_files"] = static_files.map(&:to_liquid)
  site_map.data["xsl"] = file_exists?("sitemap.xsl")
  site_map
end
As we can see, it generates and adds additional contents (sitemap.xml and robots.txt) to the site.pages.
The default set of generators has only one generator: JekyllFeed::Generator that generates Atom feed. It is not hard-coded but rather specified in the generated Gemfile and _config.yml when running $ jekyll new.
Rendering Contents (render)
After getting contents and generating additional contents in the previous steps, site.posts and site.pages are now ready to be rendered by the site.render() method:
def render
  relative_permalinks_are_deprecated

  payload = site_payload

  Jekyll::Hooks.trigger :site, :pre_render, self, payload

  render_docs(payload)
  render_pages(payload)

  Jekyll::Hooks.trigger :site, :post_render, self, payload
  nil
end
site.render_docs() and site.render_pages() call site.render_regenerated(...) underneath with collections of documents and pages with the site itself as context (payload):
def render_regenerated(document, payload)
  return unless regenerator.regenerate?(document)

  document.renderer.payload = payload
  document.output = document.renderer.run
  document.trigger_hooks(:post_render)
end
document.output = document.renderer.run is what generates the rendered post or page. document.renderer, if not assigned (maybe by a plugin), will be the default Renderer that renders as follows:
- If the document or the page needs to be rendered as a
Liquidtemplate, do that first - Run each
site.converters. A converter is a type of plugin that takes the content and convert it to another content. Default converters are:Markdown,SmartyPants,Sass,Scss, andIdentity. Each converter will run on the content if the extension of the content matches the converter's specified extension(s) (e.g.,Markdownwill run for.mdand.markdown). This generates what we calloutput - Trigger
post_converthooks (if any) - Finally, place the
outputin layouts if needed, creating the final renderedoutput. More on layouts in the Layouts and Theme section
Like generators, converters are plugins discovered and loaded during the setup of the Build command (see The Plugin System).
This is an example from the built-in Markdown converter:
def convert(content)
  setup                       # Basically set @parser = KramdownParser.new and setup cache
  @cache.getset(content) do   # Check if already in cache, see Caching section beloew
    @parser.convert(content)
  end
end
The Markdown converter is very straightforward, it calls to a parser which by default is based on the Kramdown gem, to convert the Markdown content into HTML.
You might also notice the regenerator.regenerate?(document) line before we do the rendering in the render_regenerated() method. This is the experimental incremental build feature that is disabled by default. If enabled, it will prevent rendering of the document if it's not modified, saving time to build. The modification checks are complicated and won't be covered here, you may explore from the code itself if interested.
Cleaning Up (cleanup)
site.cleanup() calls Cleaner#cleanup!() which remove obsolete files. Obsolete files are files that are not in the newly generated set of files that we build in this call, tracked by using site.each_site_file() that returns output destinations of the files from the read step.
Writing the Rendered Outputs (write)
Finally, the actual file writes are done by site.write(), which just calls each document's or page's write() method to write its output rendered by the previous site.render() call to the destination (site.dest, by default is "_site"). For example, this is the code from the Jekyll::Document#write(...):
def write(dest)
  path = destination(dest)
  FileUtils.mkdir_p(File.dirname(path))
  Jekyll.logger.debug "Writing:", path
  File.write(path, output, :mode => "wb")

  trigger_hooks(:post_write)
end
And this is #write() method from the module Jekyll::Convertible, used by Jekyll::Page and Jekyll::Layout, which looks very similar to Jekyll::Document#write(...):
def write(dest)
  path = destination(dest)
  FileUtils.mkdir_p(File.dirname(path))
  Jekyll.logger.debug "Writing:", path
  File.write(path, output, :mode => "wb")
  Jekyll::Hooks.trigger hook_owner, :post_write, self
end
And that's it. When the calls to all documents and pages are finished, the site is now fully generated and ready to be served.
NOTE: I'm not sure why developers of Jekyll don't make
Jekyll::DocumentaJekyll::Convertiblelike they did with page and layout. And sadly I don't have time to find out.
Watching for the Source File Changes
After the rendering is done, the Build command will call the Jekyll::Watcher#watch(options, site), which uses listen gem to monitor the source files directory. Any file changed under the source files directory will trigger the site to be rebuilt by calling site.process() again.
The code looks kind of like this:
require 'listen'

def build_listener(site, options)
  Listen.to(
    options["source"],
    :ignore        => listen_ignore_paths(options),
    :force_polling => options["force_polling"],
    &listen_handler(site)
  )
end

def listen_handler(site)
  proc do |modified, added, removed|
    t = Time.now
    c = modified + added + removed
    n = c.length

    Jekyll.logger.info "Regenerating:",
                       "#{n} file(s) changed at #{t.strftime("%Y-%m-%d %H:%M:%S")}"

    c.each { |path| Jekyll.logger.info "", path["#{site.source}/".length..-1] }
    process(site, t)     # Call site.process()
  end
end
The Serve Command
The Serve command starts the WEBrick process, which serves all the rendered files from the Build command via HTTP. Additionally, by default, it also injects the LiveReload.js, starts the LiveReloadReactor in another thread so it can communicate with the LiveReload.js via WebSockets, and registers a Jekyll's post_render and post_write hooks so that the LiveReloadReactor sends the "reload" command to the LiveReload.js when the site gets rebuilt.
Funnily, not that it's important, but the LiveReload injection gets skipped if the browser is bad (i.e., it is MSIE).
And that's how our rendered files get served and how the browser triggers the refresh when our contents are re-rendered.
The Plugin System
Plugin gets discovered and loaded in three ways: as provided with *.rb files in _plugins directory from the site root, as gems, and as provided by the theme in use. You can see the loading code here:
class Jekyll::PluginManager
  # ...
  def conscientious_require
    require_theme_deps if site.theme
    require_plugin_files
    require_gems
    deprecation_checks
  end
  # ...
end
This method gets used by the site.setup() during the Build command (when calling Site#new(...)):
def setup
  ensure_not_in_dest

  plugin_manager.conscientious_require

  self.converters = instantiate_subclasses(Jekyll::Converter)
  self.generators = instantiate_subclasses(Jekyll::Generator)
end
PluginManager#conscientious_require only requires the Ruby files and gems. The actual initialization of the plugins are done by the instantiate_subclasses() method which works as follows:
def instantiate_subclasses(klass)
  klass.descendants.select { |c| !safe || c.safe }.tap do |result|
    result.sort!
    result.map! { |c| c.new(config) }
  end
end
We use Class#descendants(), provided by the ActiveSupport gem, that uses Ruby v3 feature: Class#subclasses() to track all the descendants of the klass, in this case Jekyll::Converter and Jekyll::Generator. The instantiate_subclasses method retrieves all the plugins this way, then initialize them and put them into site.converters and site.generators to be used later.
So, when Build command is running, the build pipeline looks like this:
flowchart LR
  Reset e1@--> Read e2@--> Generate[Run Generator Plugins] e3@--> Render[Run Liquid Templates and Converter Plugins] e4@--> Cleanup e5@--> Write
Layouts and Theme
Layouts are Liquid template files retrieved in the read step that we covered in The Build Command section. The read step uses LayoutReader to go through the site's layout directory and the theme's layout directory to retrieve all the layout template files.
An example layout template file looks like this (though it is usually more complex with lots of includes and refers many asset files such as stylesheets and scripts):
<!doctype html>
<html>
  <head>
    <meta charset="utf-8">
    <title>{{ page.title }}</title>
  </head>
  <body>
    {{ content }}
  </body>
</html>
Layouts then simply get rendered as the final instruction in the render step of the Build command by passing the content and page info (such as title, tags, etc.) as a rendering payload (Liquid::Drop rendering context). You can see how the payload is used in the above example template: {{ page.title }} and {{ content }}.
A layout can also have an outer layout, so we recursively place rendered content with layout in outer layout until there is no more outer layout to place in.
That's all there is to it for layouts and theme.
NOTE: Interestingly, the
includetag used to include other file's content (such as a header template) into the template is a Jekyll's customized Liquid tag rather than the Liquid's built-inincludetag. My best guess is because to support snippet inclusion via variable, simpler include template file locating, and for some optimizations.
Profiling
site.process() can be run with config["profile"] = true ($jekyll serve --profile in the command line), this makes it calls site.profiler.profile_process():
def profile_process
  profile_data = { "PHASE" => "TIME" }

  [:reset, :read, :generate, :render, :cleanup, :write].each do |method|
    start_time = Time.now
    @site.send(method)
    end_time = (Time.now - start_time).round(4)
    profile_data[method.to_s.upcase] = format("%.4f", end_time)
  end

  Jekyll.logger.info "\nBuild Process Summary:"
  Jekyll.logger.info Profiler.tabulate(Array(profile_data))

  Jekyll.logger.info "\nSite Render Stats:"
  @site.print_stats
end
As you might guess, it calls reset, read, generate, render, cleanup, and write, exactly the same as site.process() (see The Build Command section). But now it calls each step with a timer. Then it sends timers data to Profiler.tabulate(...) to print it using the terminal-table gem.
Additionally, the Liquid rendering stats will also be printed. The default Renderer used during the site.process() uses LiquidRenderer, which are a wrapper around Liquid::Template, to render and track statistics.
The results may look like this:
Build Process Summary:

| PHASE    |   TIME |
|    --    |   --   |
| RESET    | 0.0000 |
| READ     | 0.0047 |
| GENERATE | 0.0003 |
| RENDER   | 0.1293 |
| CLEANUP  | 0.0009 |
| WRITE    | 0.0009 |

Site Render Stats:

| Filename                                     | Count |  Bytes |  Time |
|                   --                         |  --   |   --   |  --   |
| _posts/2026-08-12-welcome-to-jekyll.markdown |     1 |  1.76K | 0.090 |
| minima-2.5.2/_layouts/default.html           |     5 | 25.78K | 0.011 |
| minima-2.5.2/_includes/head.html             |     5 | 10.03K | 0.009 |
| minima-2.5.2/_layouts/post.html              |     1 |  2.28K | 0.004 |
| feed.xml                                     |     1 |  3.31K | 0.002 |
| minima-2.5.2/_includes/header.html           |     5 |  5.15K | 0.001 |
| minima-2.5.2/_includes/footer.html           |     5 |  5.82K | 0.000 |
| minima-2.5.2/_includes/social.html           |     5 |  1.95K | 0.000 |
| minima-2.5.2/_layouts/home.html              |     1 |  0.38K | 0.000 |
| minima-2.5.2/_layouts/page.html              |     3 |  1.32K | 0.000 |
Caching
There are several caches used throughout the codebase. But the main one is the cache on disk for site building.
site.process() rendering make use of Jekyll::Cache, which stores rendered contents in the disk. Jekyll::Cache is the global cache store that locates a cached rendered content using the first 2 characters of the SHA2 digest of the content to be a name of the cache directory, and the rest of the digest to be the name of the cached file on disk. If found, it will not re-render and use the content of the file instead because the content stays the same.
You can see the usage example on the Markdown converter here.
The cache directory might look like this:
.jekyll-cache/Jekyll/Cache/Jekyll--Converters--Markdown/
  0b/
    4842ab6db36fe6ed779a2d5d1e5b2f96e483376f28fbc96415ea78e4d9e662
  1c/
    bec737f863e4922cee63cc2ebbfaafcd1cff8b790d8cfd2e6a5d550b648afa
  4e/
    fca0d10c5feb8e9b35eb1d994f2905bb71714e6a271f511d713b539ea5faa1
  64/
    415bb89c72690689066a644c02dc1765220435c5afc43641ea8ae770a61c01
  c8/
    7742f1aaa91906e62b3e1980649cbce1c75ae1e132f4224938854e292b79b2
  e3/
    b0c44298fc1c149afbf4c8996fb92427ae41e4649b934ca495991b7852b855
  e8/
    5c06a062afbbf3b77f98822db8ac4c3006e166b55bf5e0e13932cb0edd8194
To learn more, see the official documentation: Cache API.
Security
Running plugins can be extremely dangerous since it loads and executes arbitrary Ruby code. This impacts services that run Jekyll builds and serve the generated sites.
For example, GitHub Pages runs the build with the user-uploaded Jekyll site. If the site contains malicious _plugins/foo_generator.rb, it could lead to a Remote Code Execution vulnerability. So Jekyll introduces Safe mode that disables non-whitelisted plugins, caching to disk, and ignores symbolic links. GitHub Pages overrides the whitelisted plugins before running the build.
Throughout the codebase you will see the checks for site.safe.
NOTE: Due to supply-chain attack, even whitelisted plugins can be malicious. Do your best to contain it like execute it in the container and continuously monitor gem vulnerability disclosures.
Other Things
I haven't covered things such as a 404 page, collection, data, custom Liquid tags, hooks, etc. but I believe by now you can navigate the codebase confidently to see how those things work.
Code Worth Stealing
- lib/jekyll/site.rb especially on the plugins loading
- lib/jekyll/external.rb for how to handle when
requirefails - lib/jekyll/profiler.rb for how a simple profiler could be done for your command line
- lib/jekyll/cache.rb for how a simple cache on disk could be implemented
- lib/jekyll/commands/serve/servlet.rb for LiveReload injection for your site
- jekyll-watch if you need watching over files and reacting to changes
- History.markdown seems to be manually kept
I myself steal the LiveReloadReactor code for my own blog engine.
Epilogue
The final architecture looks like this:
block
  block
    columns 2
    block:commands:1
      columns 3
      Commands:3
      New
      Build
      block:serve:1
        columns 1
        Serve
        LiveReloadReactor
        WEBrick
      end
    end
    block:site:1
      columns 3
      Site:3
      Document["Documents"]
      Pages
      Layouts
      StaticFiles
      block:theme:1
        columns 1
        Theme
        ThemePages["Pages"]
        ThemeLayouts["Layouts"]
        ThemeGenerators["Generators"]
        ThemeConverters["Converters"]
        ThemeStaticFile["StaticFile"]
      end
      block:plugins:1
        columns 1
        Plugins
        Generators
        Converters
      end
    end
  end

style Plugins fill:#FEFDE2,stroke-width:0
style Commands fill:#FEFDE2,stroke-width:0
style Site fill:#FEFDE2,stroke-width:0
style Serve fill:#FEFDE2,stroke-width:0
style Theme fill:#FEFDE2,stroke-width:0
Reading Jekyll code feels very pleasant. It seems like it takes readability-first approach and most duplicated logic is pushed into its own class/module. The code looks engineered and seems to put practicality first rather than trying to optimize for every part.
I found this while writing a lot of contents here: https://github.com/jekyll/jekyll/wiki/How-Jekyll-works. It's funny it's so concise than this article while still great at explaining. So if you need a TL;DR, please refer to it.
If you spot any mistakes, please feel free to reach me :)